

Creating a Quicktime Container with Surround/Stereo Audio Tracks Using Final Cut Pro X
This is going to be a very specific, rather technical post, but hopefully it will help someone out in the future. Failing that, I’ll have it documented for myself in the future.
I recently spent some time remastering an old film of mine, and in that process created an all new surround sound mix. However, I wanted to make a final master video file that also included the original stereo mix for posterity (after all, I’m no George Lucas). So I had to figure out a way to create a Quicktime movie that contained two audio tracks: the surround mix and the stereo mix.
A few years back I had written an article about how to stripe audio for broadcast delivery, so I knew that there was theoretically a way to do what I wanted to do. A quick Google search turned up an official Apple support article for creating a multi-channel MXF file with Final Cut Pro X (which is excellent and I suggest you bookmark it now), however the end result would be an MXF file with 8-mono tracks, which is not what I wanted. It did however serve as an excellent starting point for what we were going to do. I’ve adapted the instructions from that article accordingly.
Import Media
First, import your master video file, and your finished audio mixes.
Create a surround project in Final Cut Pro. This is where we’re going to put everything together.
Import your finished video Master File and your finished audio mixes (as interleaved files).
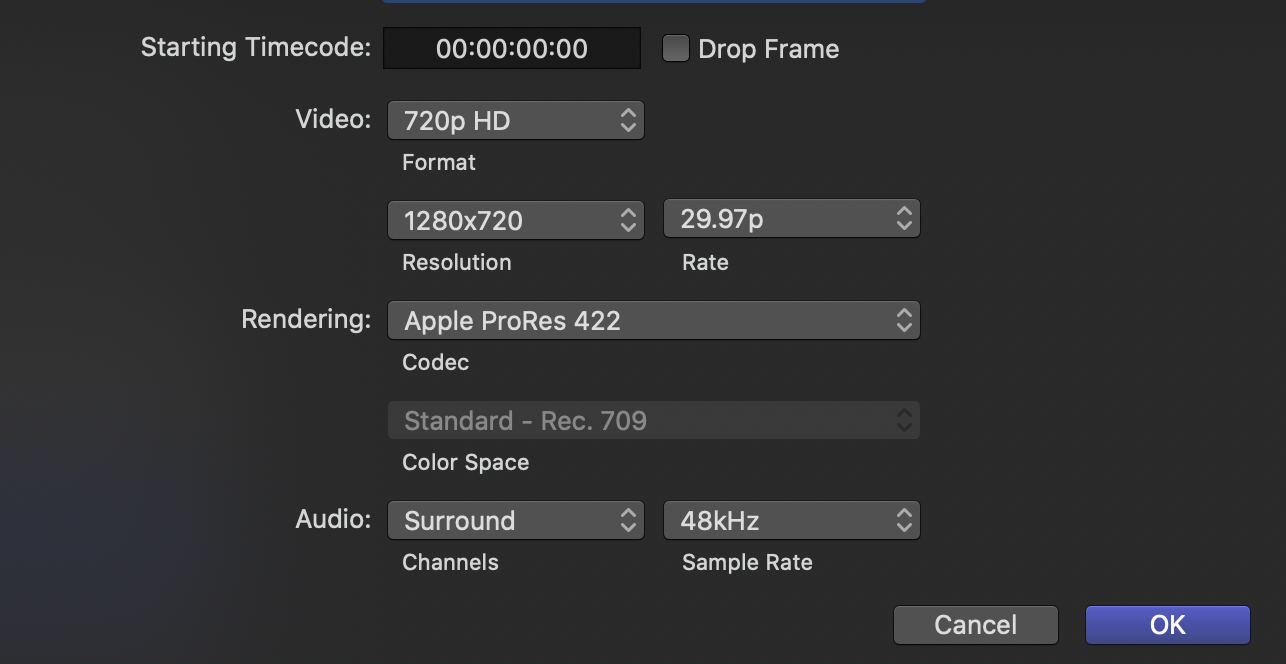
You’ll want to make sure the resolution/frame rate matches your video resolution/frame rate. This video just happens to only be 720p.
Assign Roles
Next we’re going to assign roles, and sync our video and audio.
In the Timeline Index, click Roles to view clips by role and subrole.
Choose Modify > Edit Roles
Create a new custom audio role named “5-1 Mix”
Create another new custom audio role named “Stereo Mix”
Assign roles to your mixes accordingly.
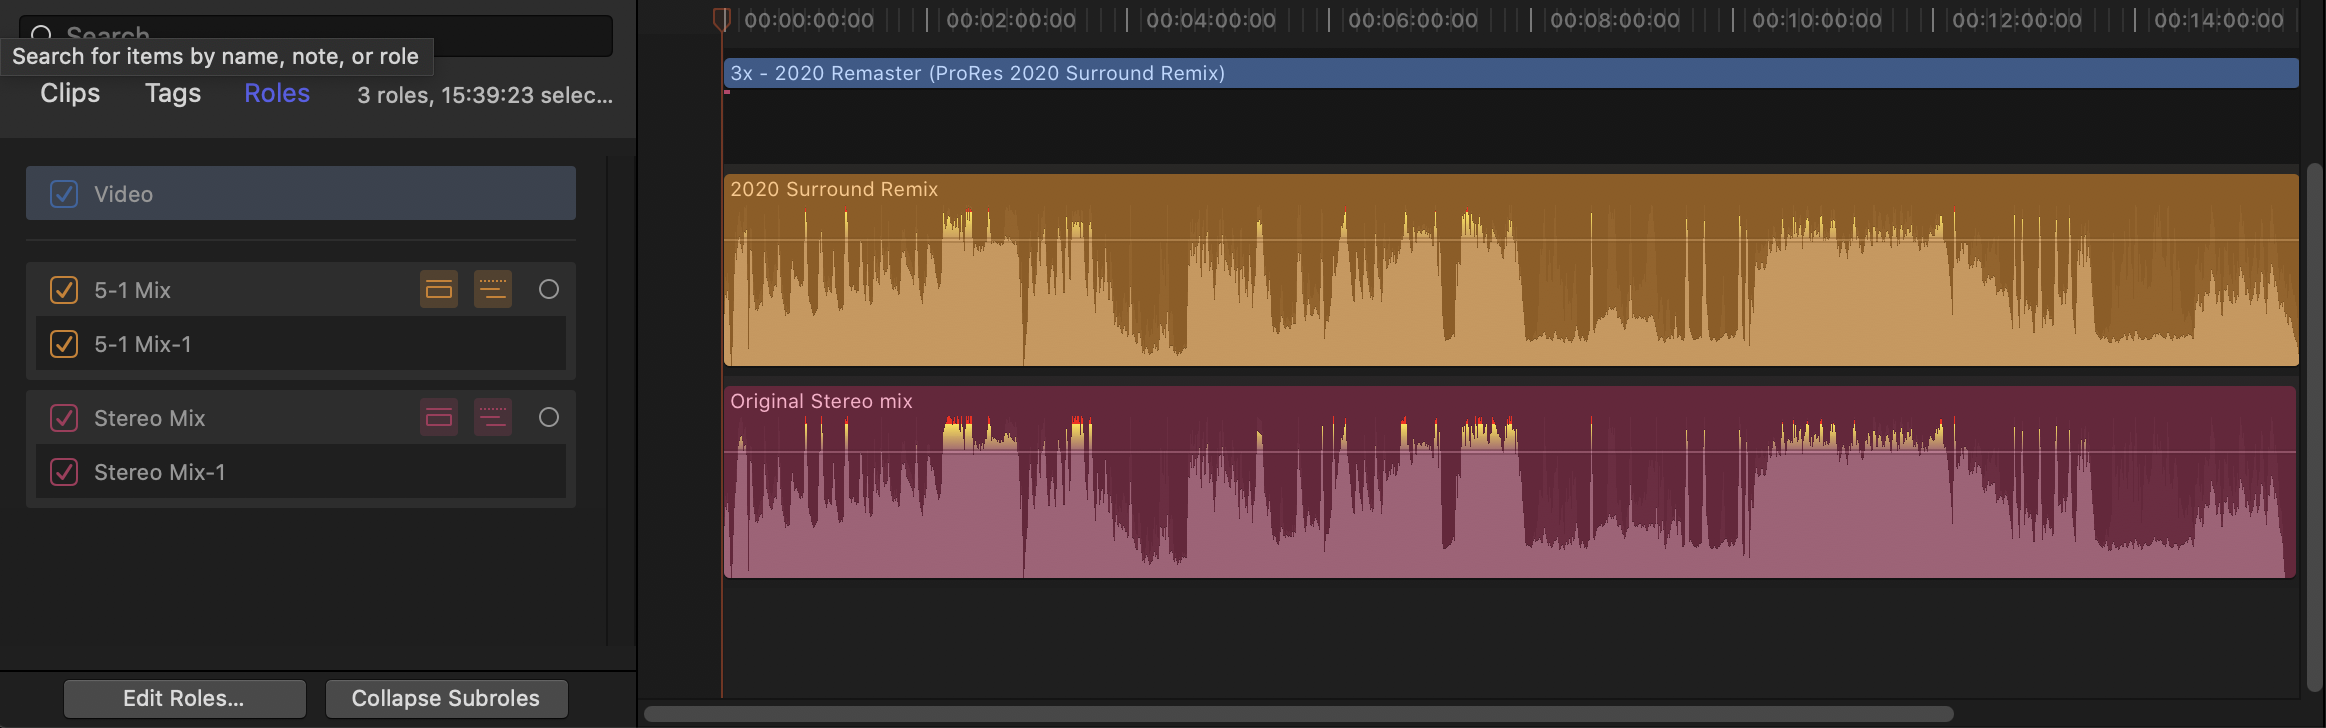
Edit the video into the timeline. Edit and sync the 5.1 surround mix and stereo mix into the Timeline. You should have something that looks similar to this:
Share the project
Finally we’ll export our video as a multitrack QuickTime file.
Choose File > Share > Master File
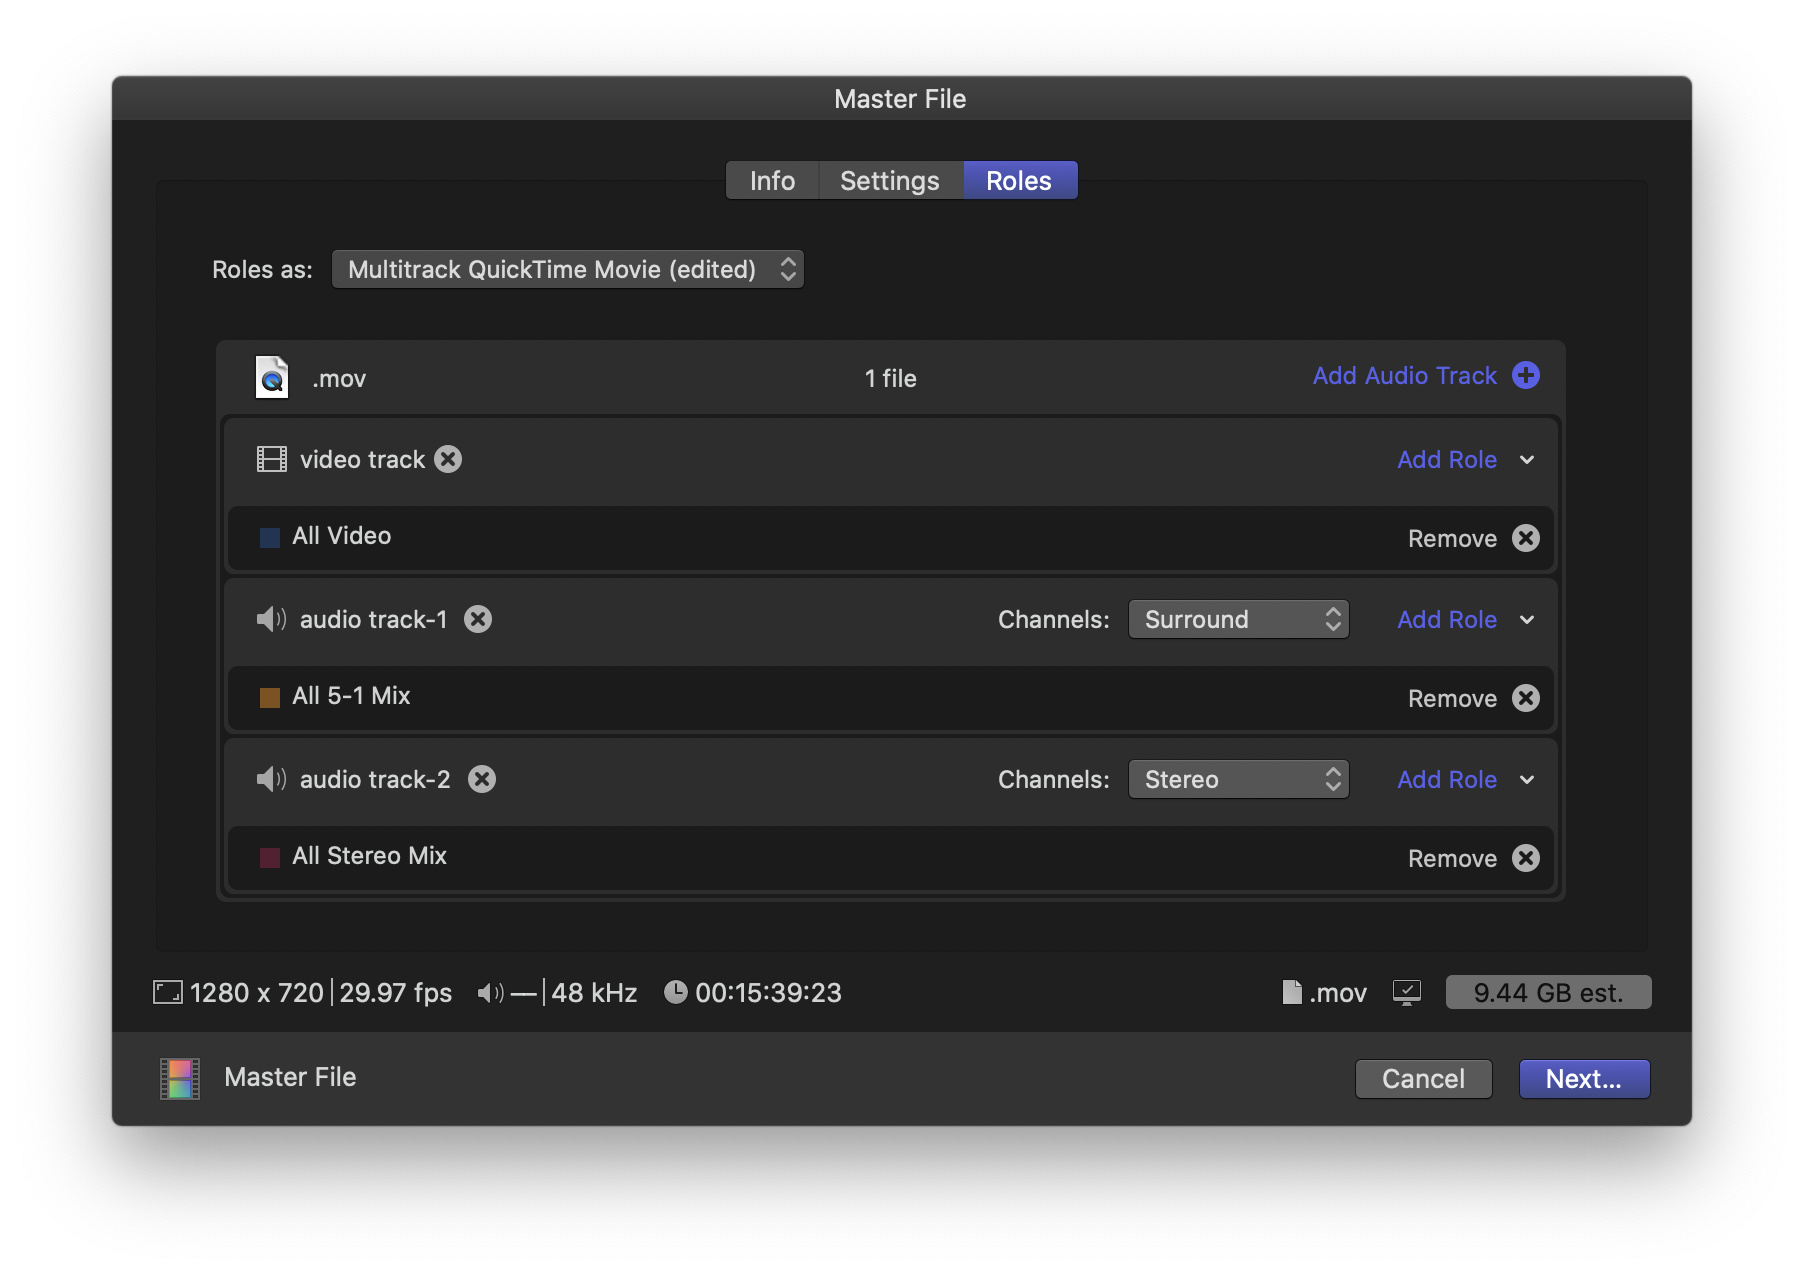
Click on “Roles”
From the “Role as” pop-up menu, select “Multitrack QuickTime Movie”
Set the channels to “surround” and “stereo” from the “Channels” pop-up menu accordingly.
Click next, and let Final Cut Pro export your file.
If you’ve done everything correctly you should end up with a ProRes master file that includes 1 audio track featuring your surround mix, and 1 audio track featuring your stereo mix. You could, in theory, create even more audio tracks (say for alternate languages) in the same way. Just create more roles, and assign accordingly.
You can then throw this file at a program like Compressor, or in my case HandBrake, because I need to be able to encode an AC3 audio track for my home theatre set-up to playback the surround audio.